

My Sourdough Process
How I make sourdough bread from A-Z: Starting with feeding my starter and ending up with a baked loaf. Full recipe included.
There are a million different “how-tos” on how people make sourdough. So why should I add mine to the mix? Well, I figured whats one more?
No, but really I wanted to get this down in writing with a step-by-step guide of how I do it. I get a lot of questions about my process and the timings for my baking, so I wanted to gather it all in one post! Do keep in mind this is a long one, so if you want the short version - check out my reels, or stay tuned for a shorter post that will be coming up.
Let’s jump right into it.
For 1 loaf of bread you will need:
100 g starter370 g water
300 g organic sifted wheat flour (the ones I use are around 12-13 % protein)
75 g organic sifted spelt
75 g organic whole spelt (finely milled)
50 g whole emmer (finely milled)
11 g salt
≈ 30 g more water along with the salt
Thursday at 9 pm (the evening before) : Feed the starter
I take my starter out of the fridge and feed it at a 1:5:5 ratio, but sometimes I add a little more flour to thicken it a bit.
That means 12 grams of starter, 60 grams of water and 60-66 grams of organic wheat flour.
Mark the starting point with a rubber band, and cover the jar or glass loosely with the lid. Leave in on your kitchen counter or somewhere in your home where the temperature is stable overnight. My house is around 20C and this temperature and feeding ratio works great for letting the starter peak overnight.
Friday at 7 am : Mix the dough
The morning after, your starter should have peaked, and juuuust about started deflating in the morning. Mine usually triples, but as long as it at least doubles before it starts deflating, you’re good :)
Note: All starters are different! So make a note of what your starter is like, how high it usually rises before it starts to deflate, and the timeframes you have to work with.
Ideally I like to use my starter a little after it’s peak, but not when it has fully deflated. I look for when it has deflated around 0,5-1 cm, this is usually at the 10-12 hour mark after feeding at a 1:5:5 ratio. At this point the starter is still strong and not very acidic, but it is starting to get hungry so it will get my dough nice and active. If you use your starter too young (before its peak), then it won’t be hungry and won’t give enough power to ferment your big dough - which is technically just one giant feeding!
So, starter care done - let’s continue!
In a large bowl I dissolve 100 grams of starter in 370 grams of water. Then I add in 500 grams of flour and stir together with a chopstick, before switching to my hands to get everything incorporated. I mix for around 4 minutes total. It should be a shaggy dough without dry lumps of flour.
I cover the dough with a tea-towel, and leave it to rest - this is called Fermentolyse. And this marks the start of our Bulk Fermentation.
Friday at 7:30 am : Add salt and mix dough
Add 11 grams of salt and around 30 grams water and distribute it by pinching it into the dough. Mix the dough well by using a combination of stretching the dough and the rubaud method, until the dough is smooth and has “cleaned the sides of the bowl”.
I usually do my mixing in 2 rounds of 3 minute mixing. So a total of 6 minutes of mixing with a little break in between. I then finish of this step by cleaning the sides of the bowl and doing one set of coil folds. This isn’t strictly necessary but I love to work in a clean bowl.
Cover and let it rest. Ideally find a place in your home that has a fairly steady temperature. Depending on the temperature in your home, the bulk fermentation may go faster or slower than this recipe. My house is usually around 20-22C.
Friday at 8:00 am : First coil fold
Do your first set of coil folds. Lift the dough up and fold it back over it self - first all along one side, then turn the bowl sideways and fold along that side as well. Cover the dough and let it rest.
You should be able to stretch the dough easily - if it feels tight and you cannot stretch it, leave it to rest longer between the sets.
Friday between 8:00 - 11:00 am : Continue coil folds
Repeat the coil folds 3 more times spread over the next 2-3 hours, letting the dough rest for around 30-45 minutes between each set.
Once you have finished sets of coil folds, leave the dough to finish bulk fermentation.
Friday at around 1:00 pm : Preshape
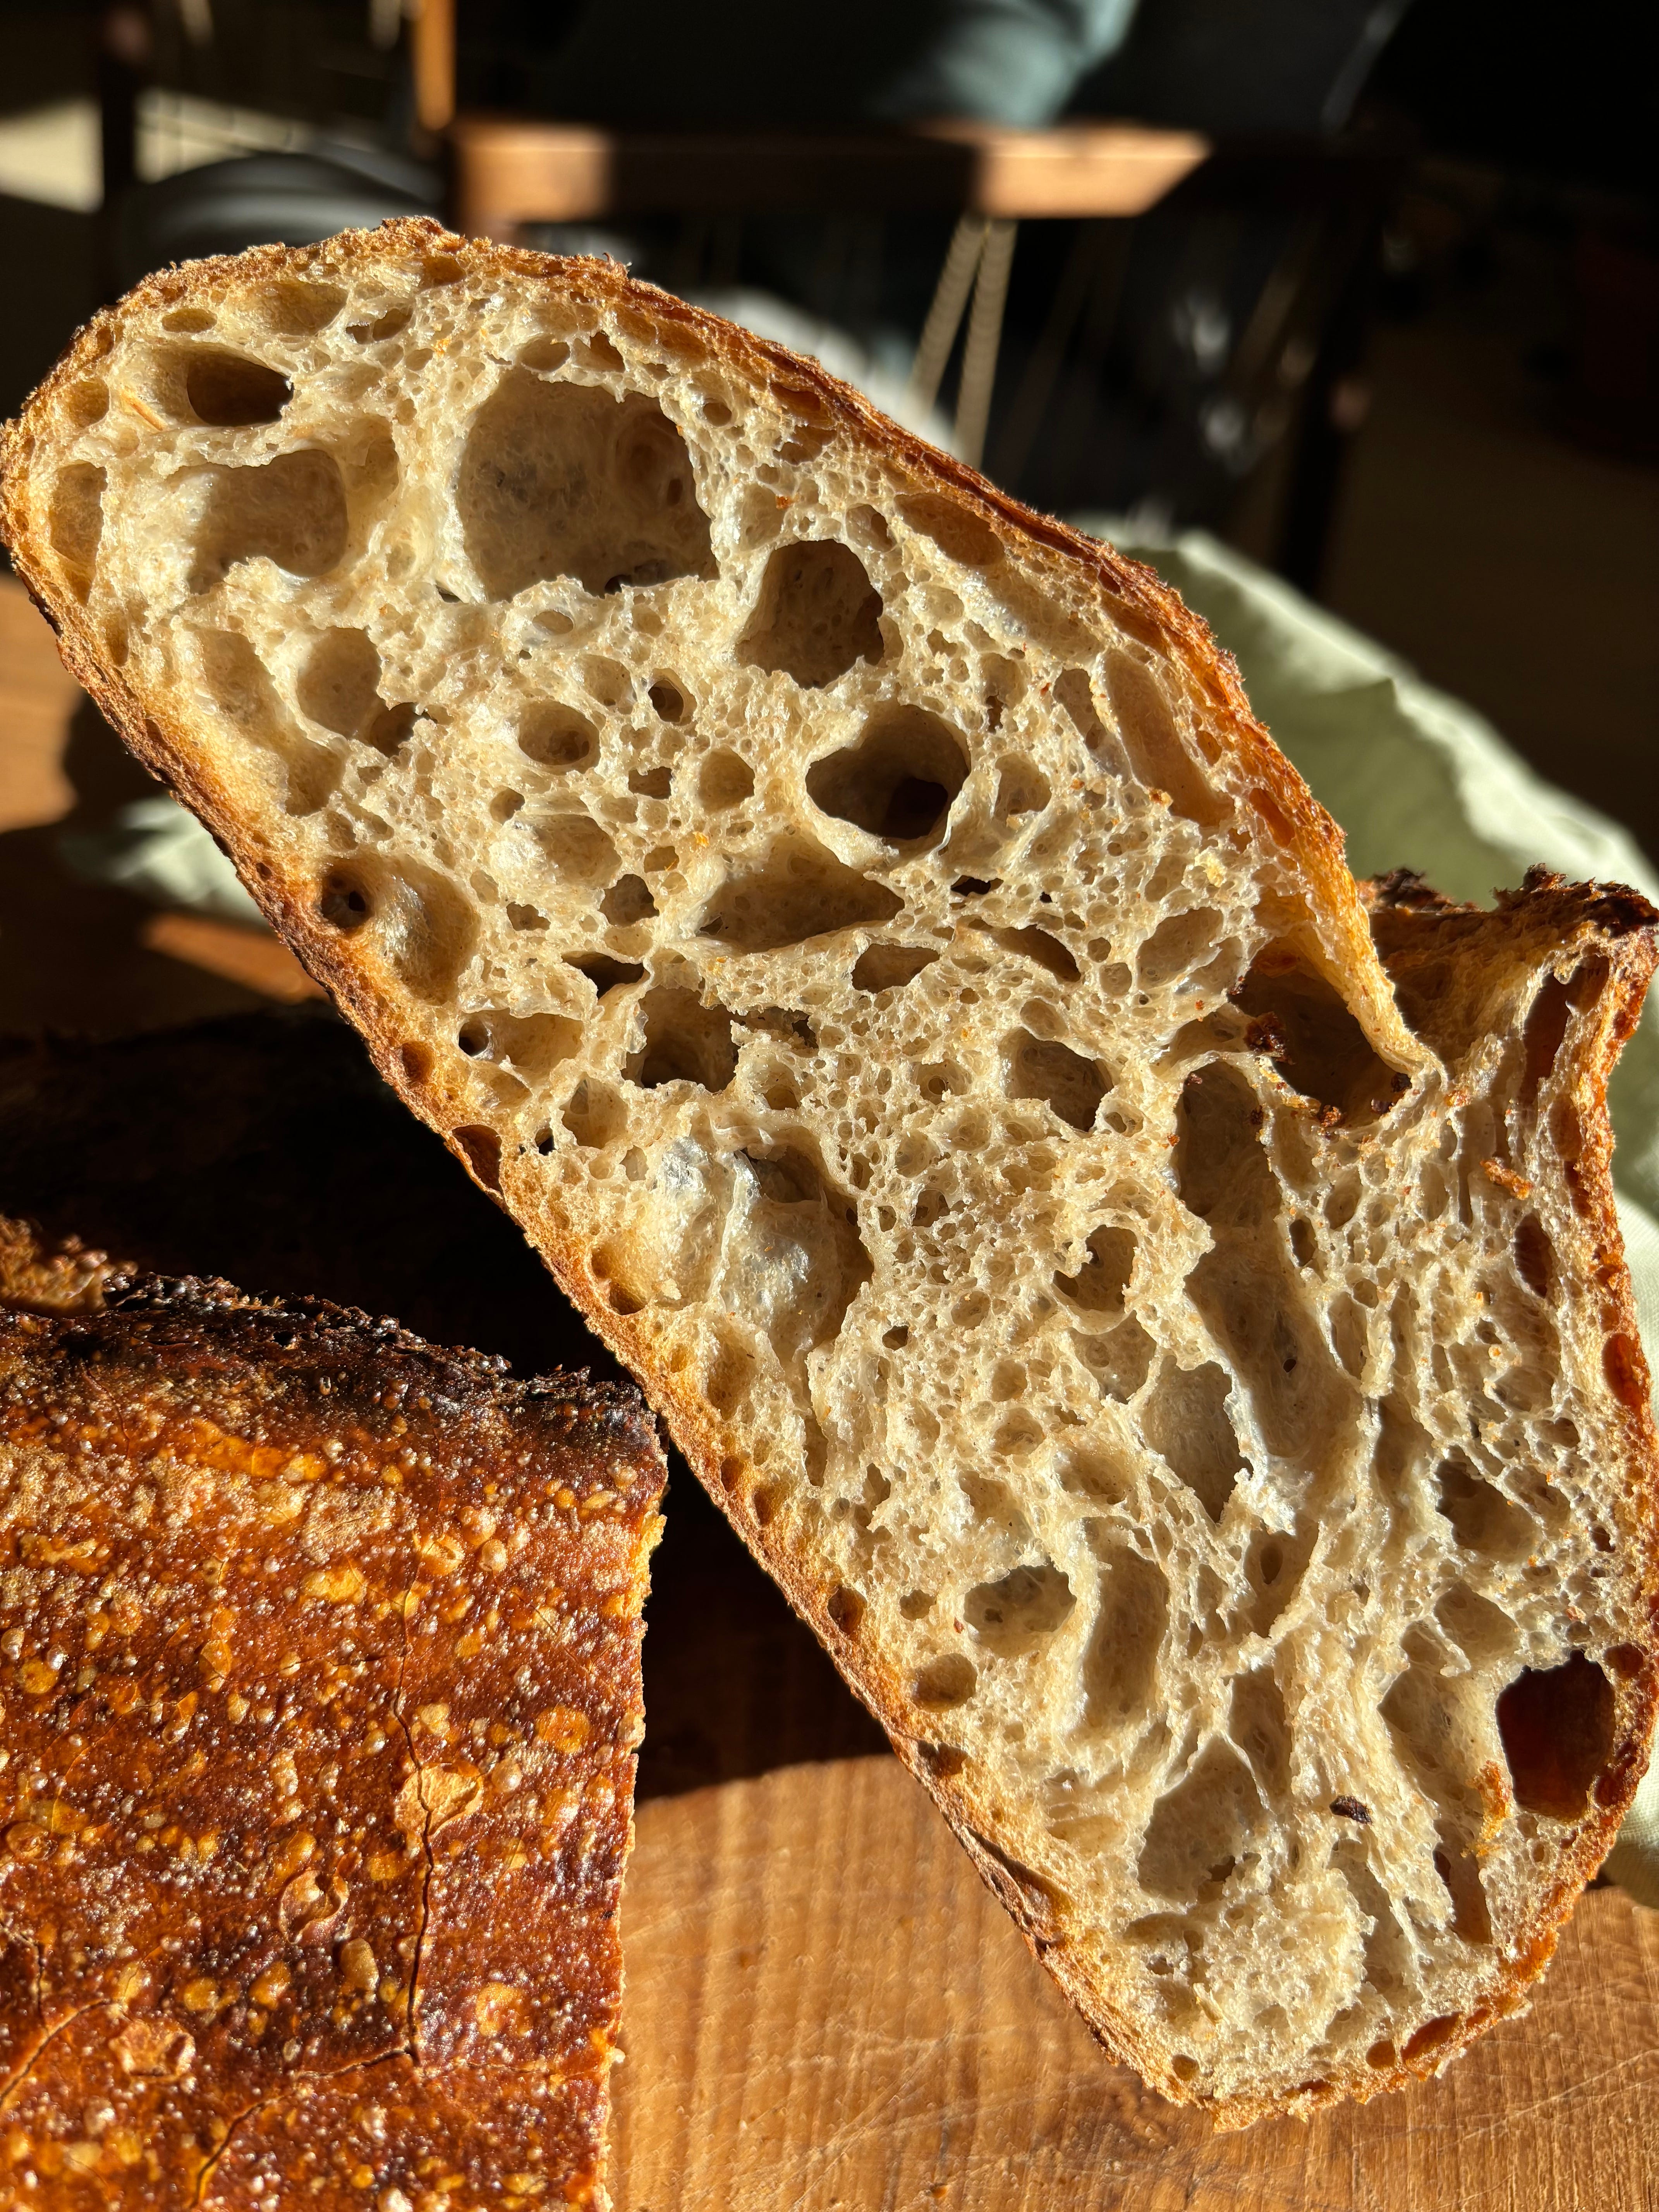
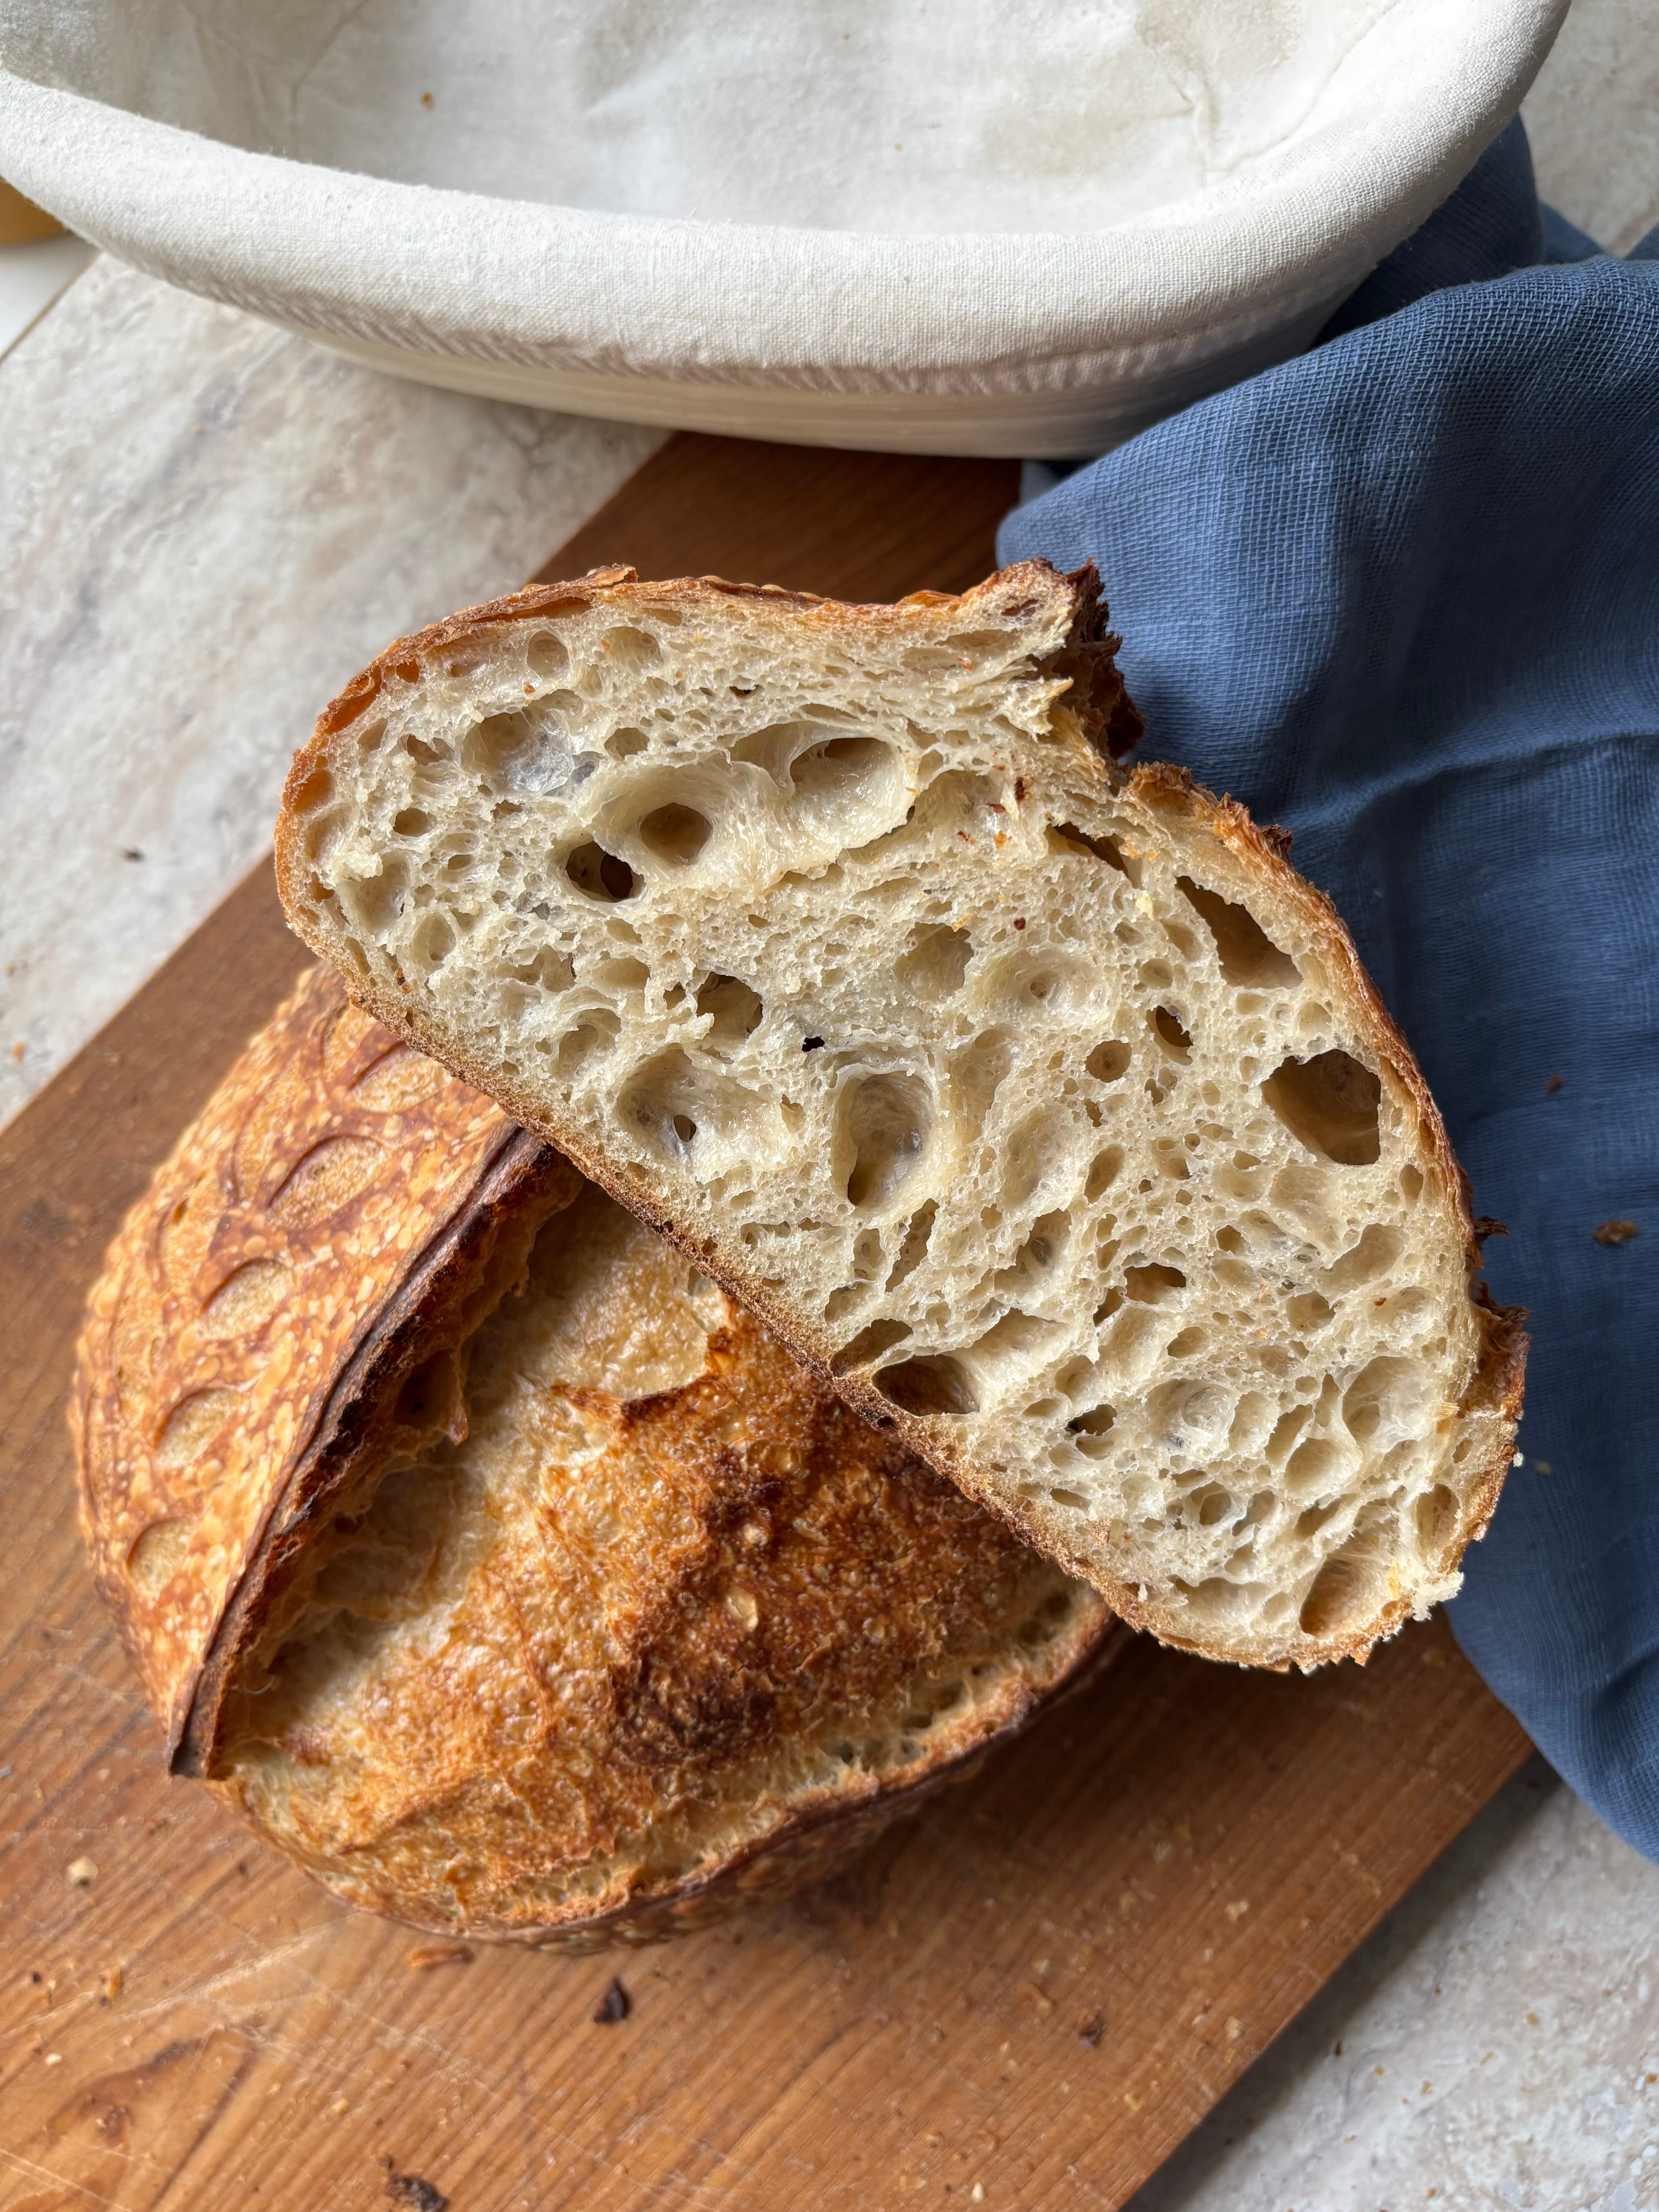
It should have risen around 50% and have visible signs of fermentation: such as bubbles on the surface. It should also come away from the sides of the bowl when you pull at it gently. Now we pre-shape - the goal here is to prepare the dough for shaping, and to create some surface tension.
Preshape the dough by spraying some water on the kitchen counter and dumping the dough out on the counter. Then shape it into a tight ball by using a dough scraper and pushing the dough away from you, then pulling it towards you while “tucking the dough in”. Your hand and the dough scraper kind of go in a counter clockwise motion when you do this. Check out my Instagram for videos on how to do this.
Alternatively you can preshape by doing what’s called a “half fold”. This is where you gently lift the dough up and fold it under itself - the same way you did during coil folds. But this time you only fold the dough once on each side. Make sure to be gentle so you do not disturb the bubbles.
Leave to rest for 30 minutes uncovered.
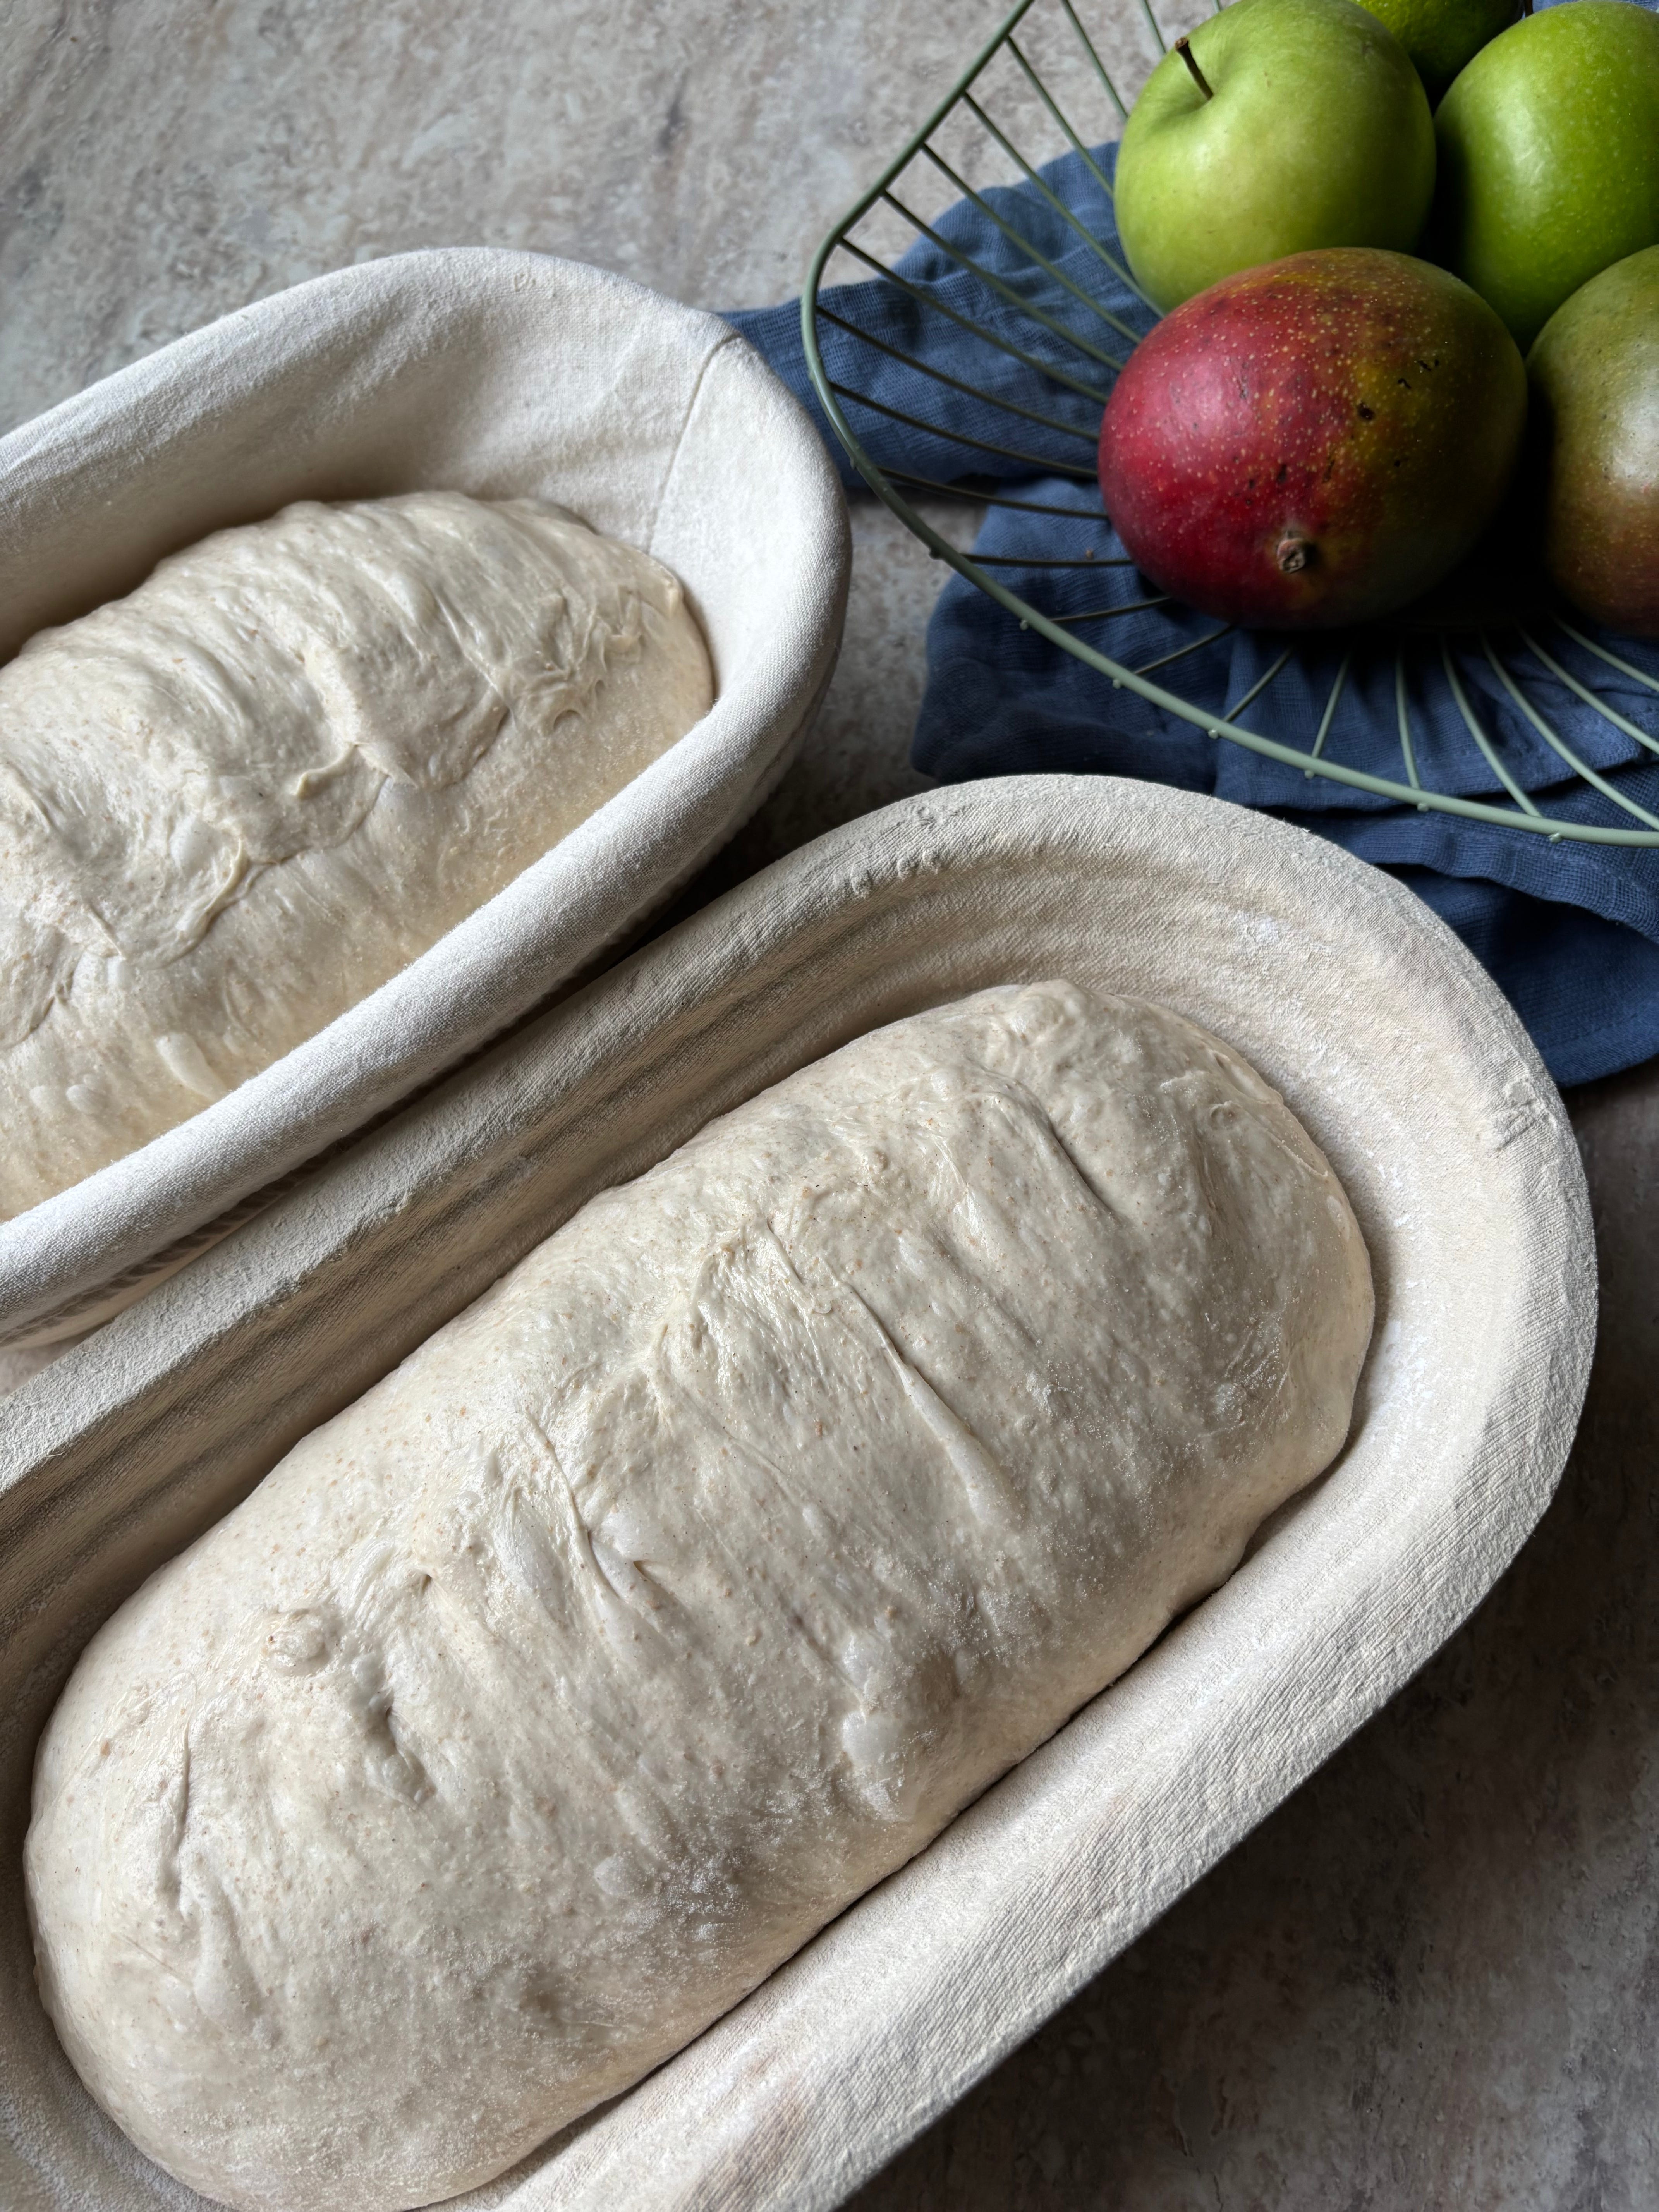
Friday at 1:30 pm : Shape
Dust a little flour on the surface, then tip the dough smooth side down onto the surface. Shape the dough by folding it and rolling it up quite tightly. The goal here is to create enough surface tension so that we get good oven spring - but not so much that the skin tears.
It is a lot of trial and error finding the method that works the best for you. Check out different videos and techniques and try them! I have some videos of this on my Instagram that you can check out.
Place the dough in a banneton with the seam side up.
Friday at 1:45 pm : Stitch and place in the fridge
Let it rest for 10-15 minutes, then give it a little stitch to tighten it up.
Then place it in the fridge to coldproof overnight or until you are ready to bake.
I usually cover my dough with a kitchen towel, but you can leave it uncovered too :)
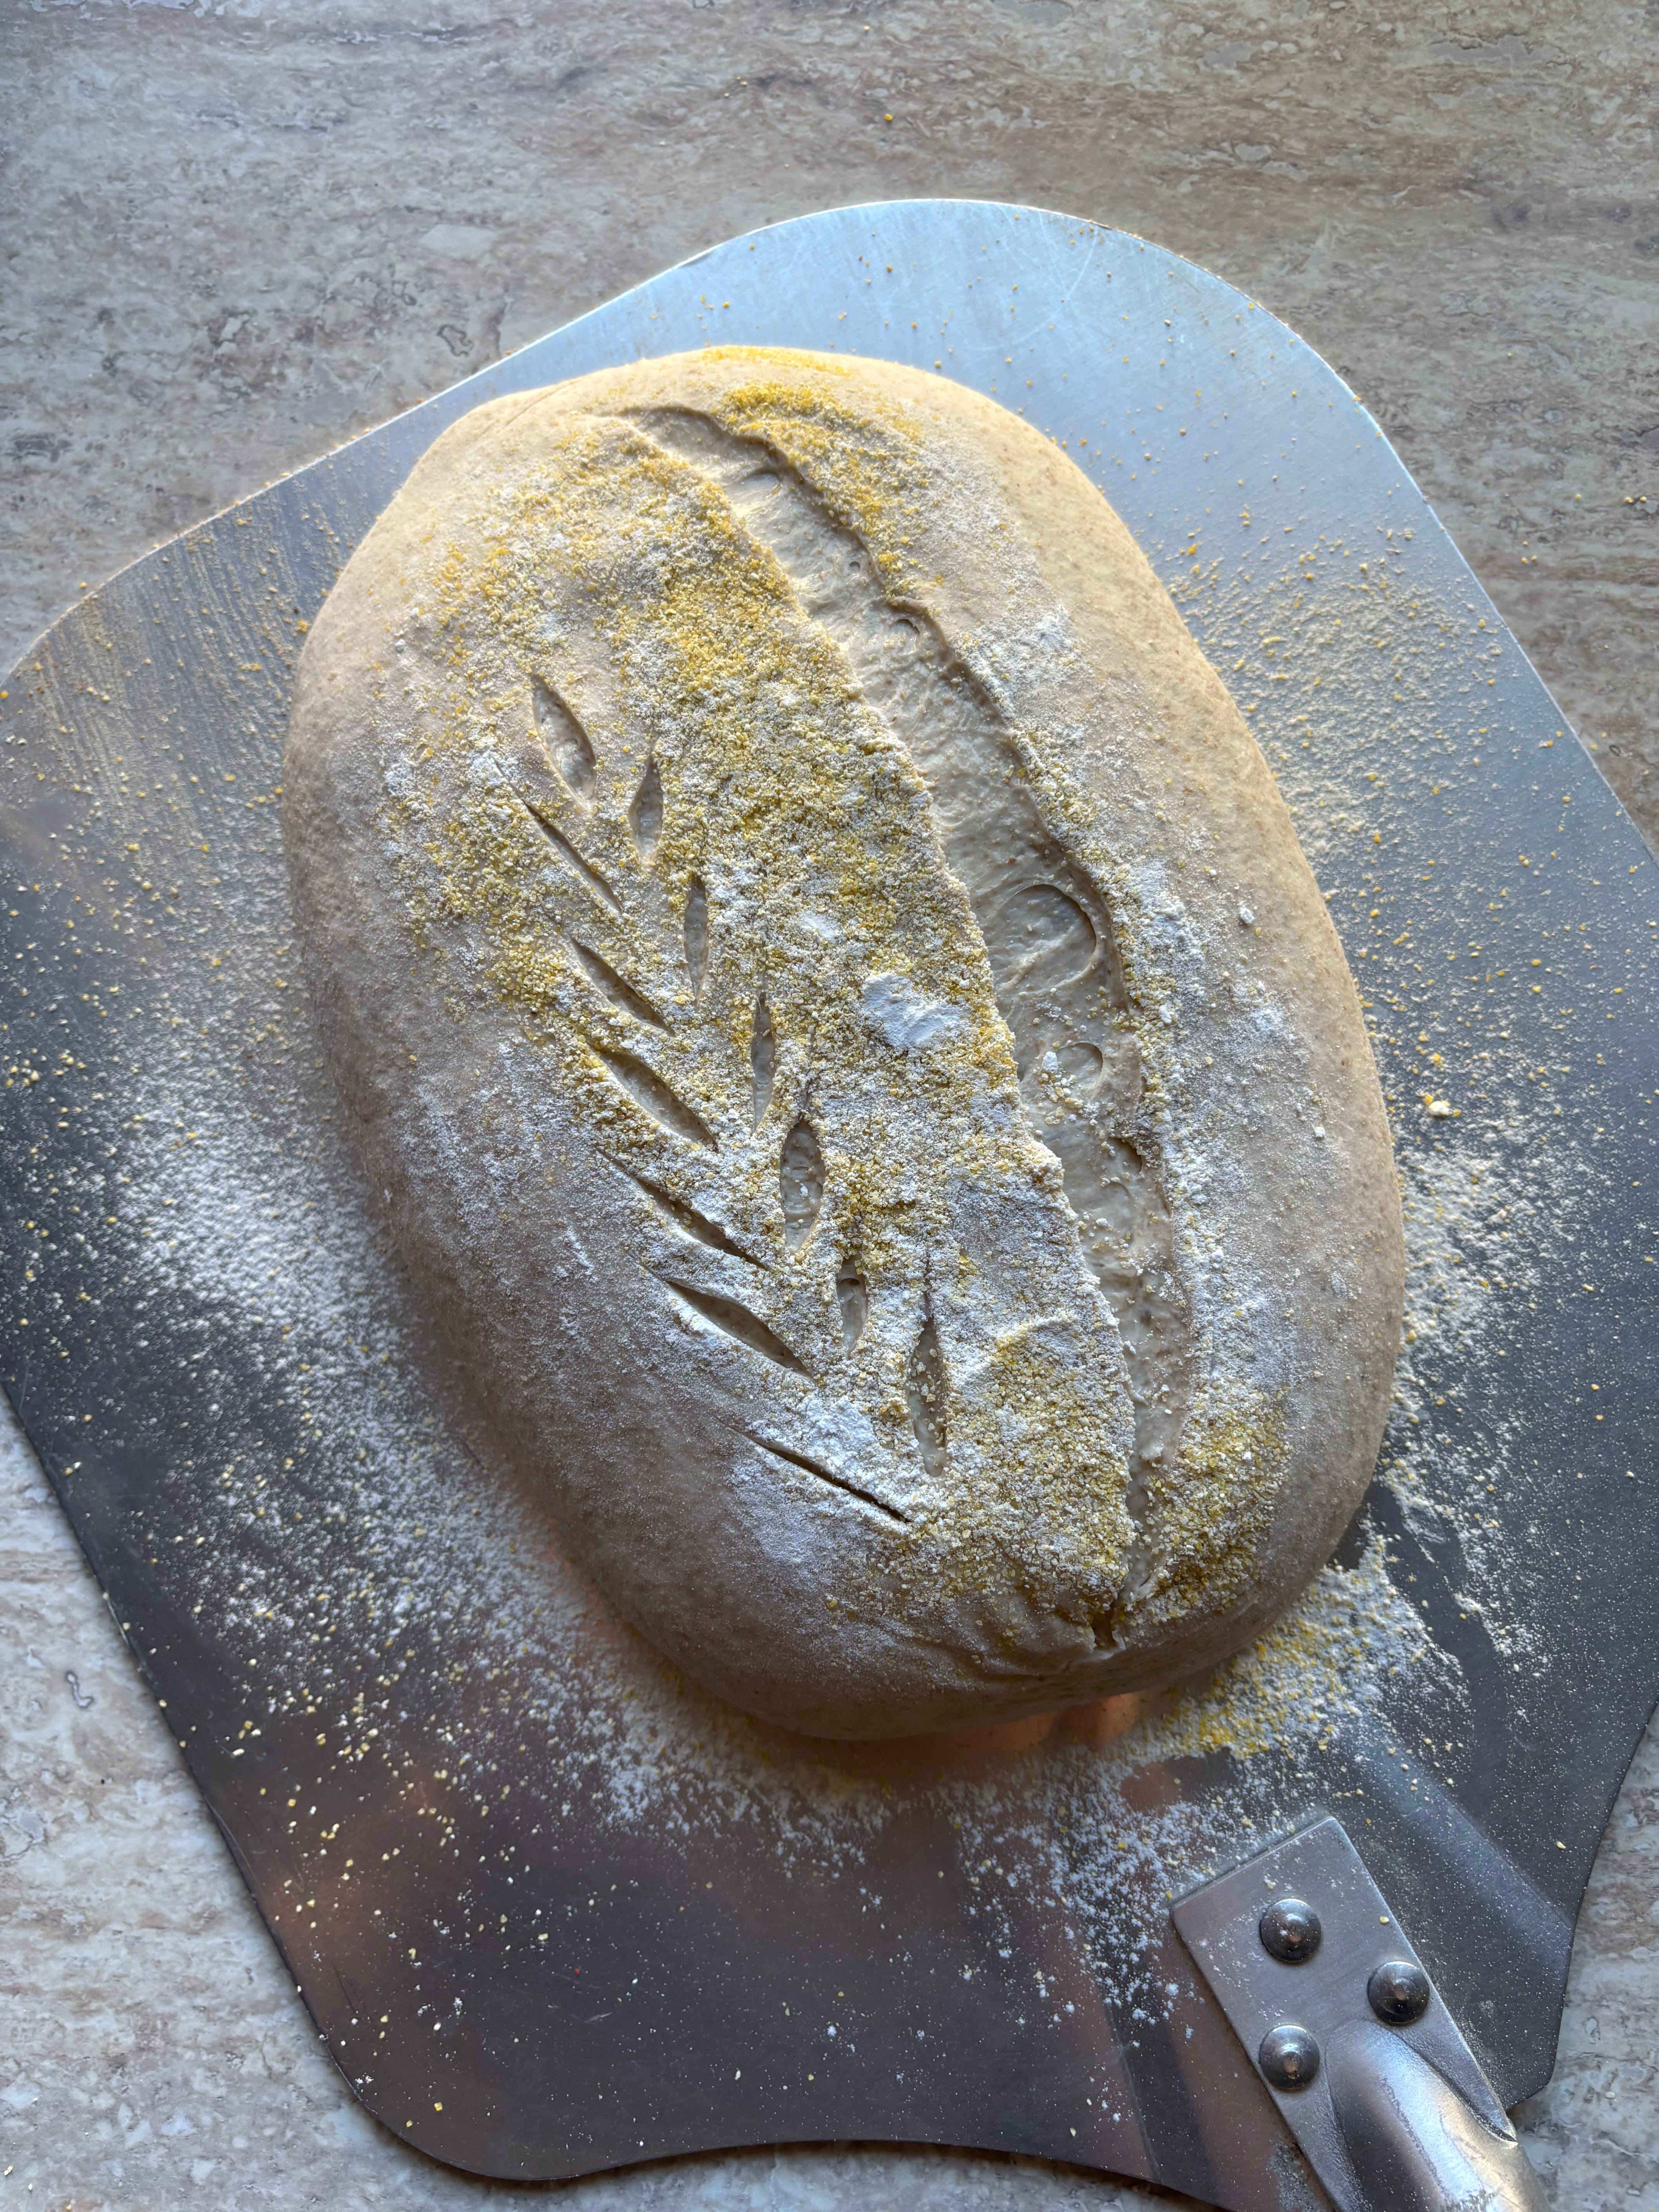
Saturday at 1:45 pm : Score and bake
Note: I normally bake with a baking steel and create steam with hot water in a tray, or by using a baking shell from Brod and Taylor. You can also use a Dutch Oven if you prefer. Simply preheat it and proceed as normal.
Preheat your oven at 250C with a baking steel for 45-60 minutes and place a tray at the bottom of the oven while preheating.
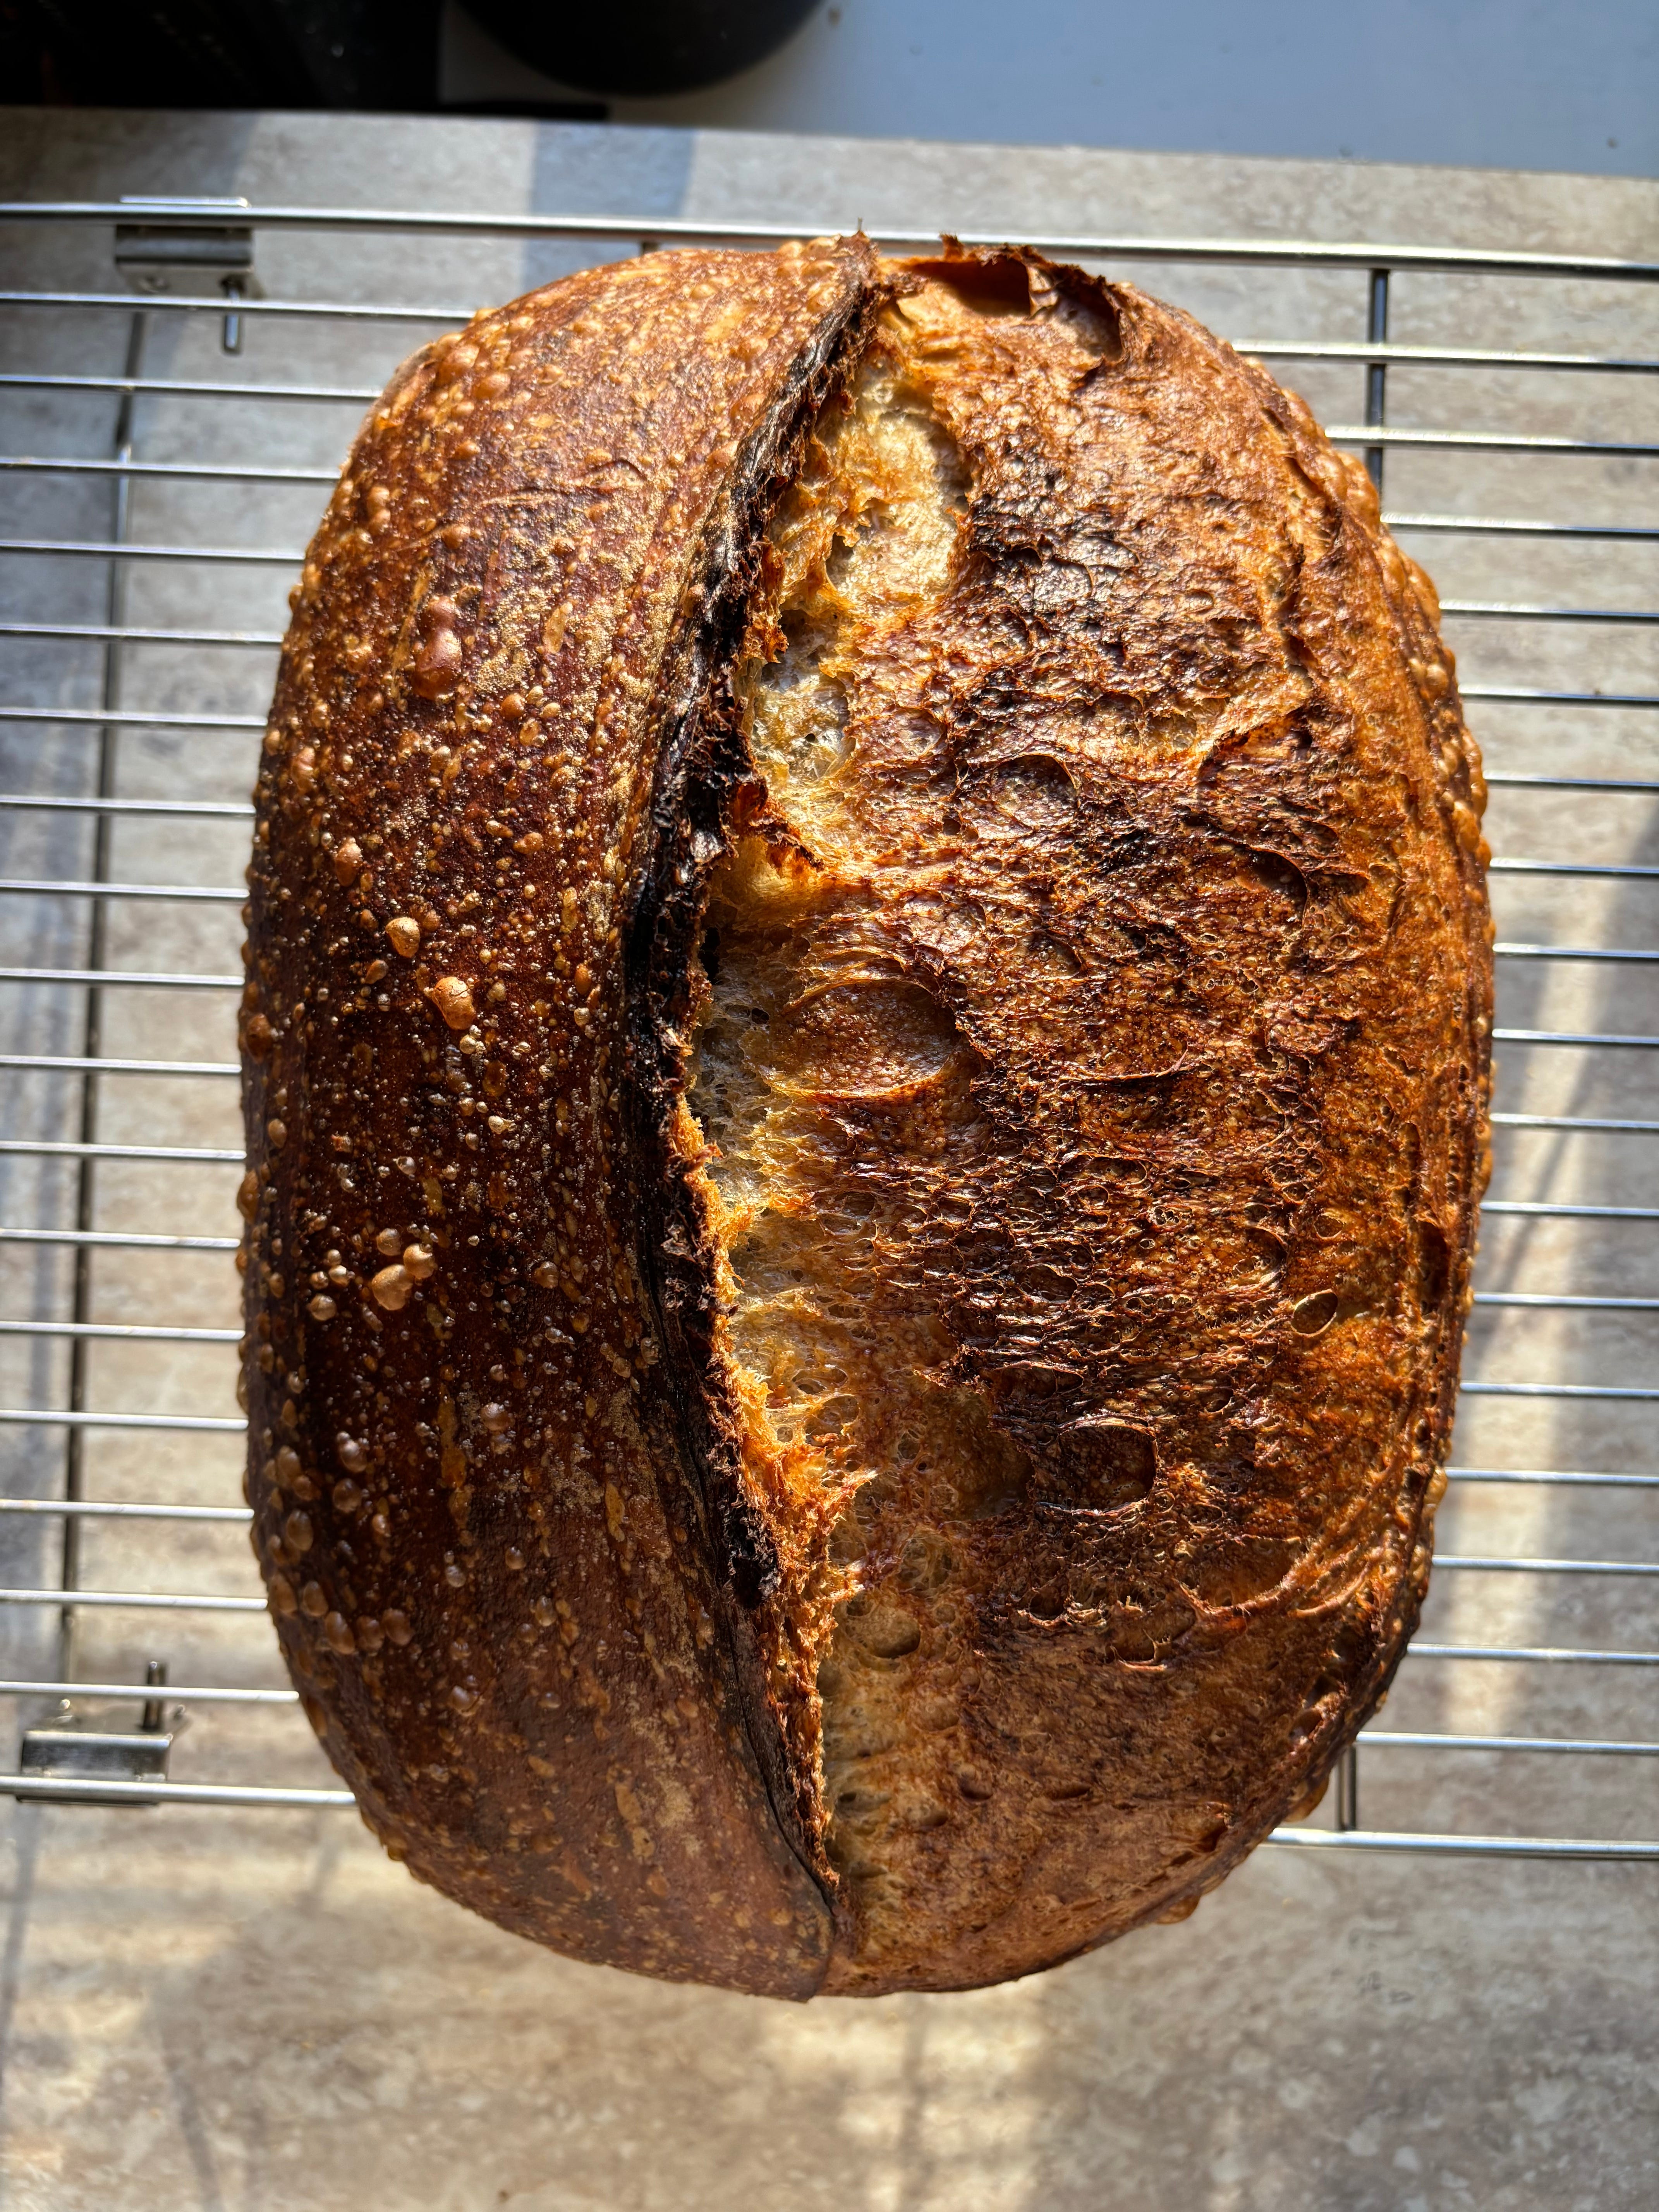
When the oven is finished preheating, boil some water in the kettle, change the oven settings to 250C bottom heat only. Take the dough out of the fridge and score it.
Then place the dough in the oven, spray with some water and pour boiling water in the preheated tray in the bottom of the oven.
Quickly close the door and bake for 20 minutes like this.
After 20 minutes, open the door to let out the steam, then turn the temperature to 230C with top and bottom heat. Bake for another 20 minutes until it is golden brown.
Now comes the hard part:
Let it cool for an hour on a wire rack before cutting into it - then enjoy obscene amounts of fresh, crusty bread with butter <3
If anyone has actually read this whole thing, I’m impressed because it was a lengthy one - so thank you! I promise I will make a shorter version someday.
Love you all!
-Emilie
Emilia- I am learning so much from your sour dough articles. Clear, practical and inspiring! Thank you 👏👏